마스터 네임 서버 만들기
웹서버 만들기
웹 서버 페키지가 설치 되어 있는지 확인
[root@localhost ~]# rpm -qa httpd
httpd-2.4.6-45.el7.centos.x86_64
시작이 되어있는 지 확인
[root@localhost ~]# systemctl status httpd
● httpd.service - The Apache HTTP Server
Loaded: loaded (/usr/lib/systemd/system/httpd.service; disabled; vendor preset:
disabled)
Active: inactive (dead)
Docs: man:httpd(8)
man:apachectl(8)
재시작
[root@localhost ~]# systemctl restart httpd
방화벽 열기
[root@localhost ~]# firewall-config
http 열기
파일 만들기
[root@localhost ~]# vi /var/www/html/index.html
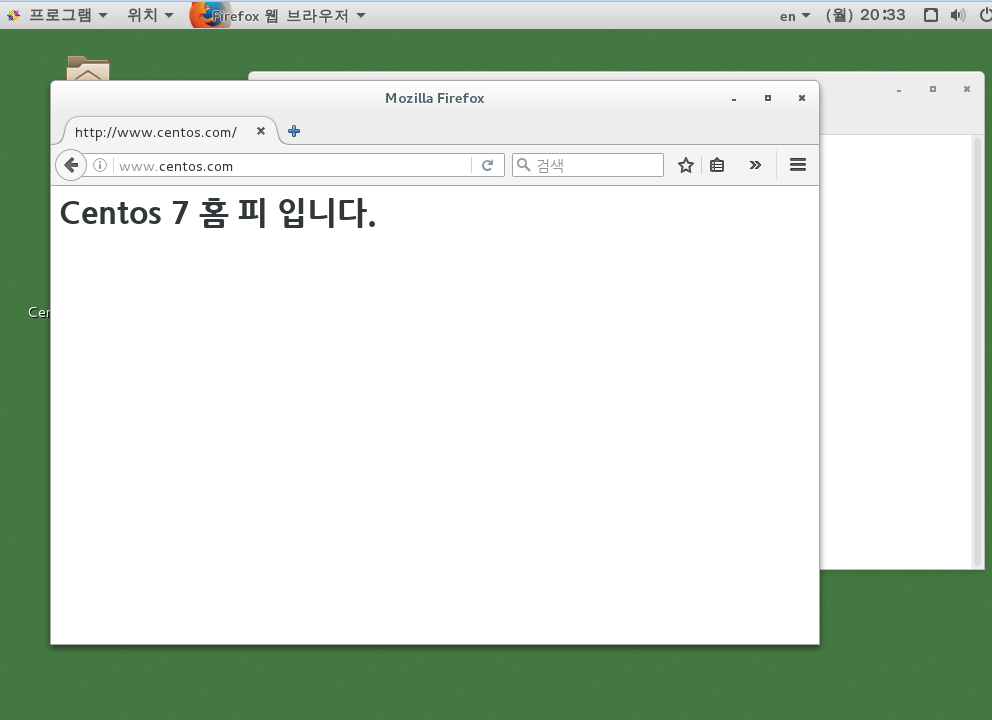
<h1> Centos 7 홈 피 입니다. </h>
[root@localhost ~]# cat /var/www/html/index.html
<h1> Centos 7 홈 피 입니다. </h>
< Server(B) 실행 >
FTP 서버가 실행하기 위해 설치
설치
# yum -y install vsftpd
방화벽 열기
# firewall-cmd --permanent --add-service=ftp
리로드
# firewall-cmd --reload
-------------------------->
다시 리눅스 client 서버
[root@localhost ~]# vi /etc/named.conf
도메인 이름을 설정.=>
아래의 내용을 설정
zone "centos.com" IN  {

    type master;
    file "centos.com.db" ;
    allow-update { none; };


};
문법적 오류가 없는지 확인
# named-checkconf
[root@localhost ~]# named-checkconf
[root@localhost ~]#
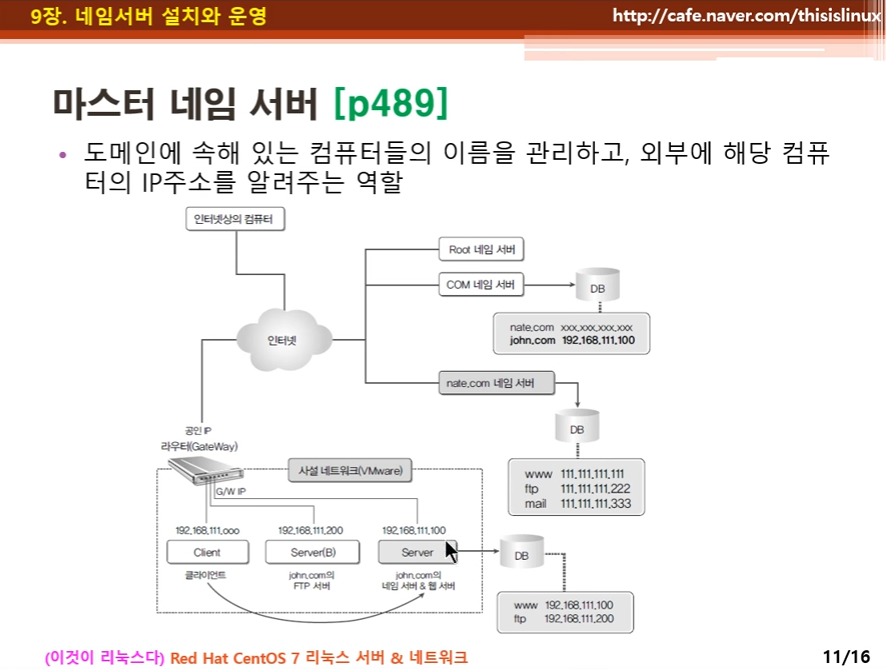
그림을 보면 서버에서 DB로 가는 화살표에서
DB 만들기
[root@localhost ~]# cd /var/named
[root@localhost named]# pwd
/var/named
[root@localhost named]# ls
chroot dynamic named.empty named.loopback
data named.ca named.localhost slaves
[root@localhost named]# touch centos.com.db
[root@localhost named]#
# vi centos.com.db
=>
$TTL    3H

@       SOA     @       root.   ( 2     1D 1H 1W 1H )
        IN      NS      @
        IN      A       192.168.111.100

www     IN      A       192.168.111.100
ftp     IN      A       192.168.111.200
=>문법적 오류 확인
[root@localhost named]# named-checkzone centos.com centos.com.db
zone centos.com/IN: loaded serial 2
OK
서비스 재시작
[root@localhost named]# systemctl restart named
[root@localhost named]#
방화벽 열기
앞에서 열었기에 패스
< 클라이언트 리눅스>
[root@localhost centos]# cat /etc/resolv.conf
# Generated by NetworkManager
search localdomain
nameserver 192.168.111.2
[root@localhost centos]# vi /etc/resolv.conf
ftp 설치
[root@localhost centos]# yum -y install ftp
[root@localhost centos]# ftp ftp.cenots.com
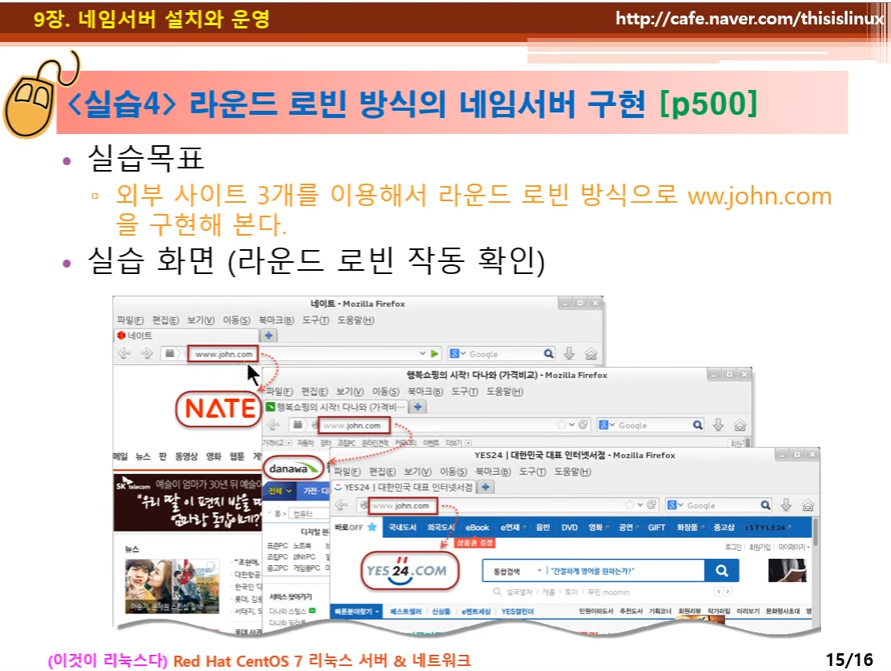
< 라운드 로빈 방식의 네임서버 구현 >
[root@localhost named]# nslookup
> www.naver.com
Server: 192.168.111.2
Address: 192.168.111.2#53
Non-authoritative answer:
www.naver.com canonical name = www.naver.com.nheos.com.
Name: www.naver.com.nheos.com
Address: 125.209.222.142
Name: www.naver.com.nheos.com
Address: 125.209.222.141
>
-----------------------------
Non-authoritative answer:
Name: www.yes24.com
Address: 61.111.13.51
> www.danawa.com
Server: 192.168.111.2
Address: 192.168.111.2#53
Non-authoritative answer:
Name: www.danawa.com
Address: 119.205.194.11
> www.nate.com
Server: 192.168.111.2
Address: 192.168.111.2#53
Non-authoritative answer:
Name: www.nate.com
Address: 120.50.132.112
>
=============>변경
[root@localhost named]# pwd
/var/named
[root@localhost named]# ls
centos.com.db data named.ca named.localhost slaves
chroot dynamic named.empty named.loopback
[root@localhost named]# vi centos.com.db
$TTL    3H
@       SOA     @       root.   ( 2     1D 1H 1W 1H )
        IN      NS      @
        IN      A       192.168.111.100

www                 IN      CNAME       webserver.centos.com.
webserver        100        IN        A    61.111.13.51
            200     IN        A    119.205.194.11
            300     IN        A       120.50.131.112
재시작
[root@localhost named]# systemctl restart named
[root@localhost named]#
확인
[root@localhost named]# nslookup
> server 192.168.111.100
Default server: 192.168.111.100
Address: 192.168.111.100#53
> www.centos.com
Server: 192.168.111.100
Address: 192.168.111.100#53
www.centos.com canonical name = webserver.centos.com.
Name: webserver.centos.com
Address: 61.111.13.51
Name: webserver.centos.com
Address: 120.50.131.112
Name: webserver.centos.com
Address: 119.205.194.11
>


댓글 ( 4)
댓글 남기기