Next.js 서버사이드렌더링
버전이 다르기 때문에 소스가 강좌와 다를 수 있다.
버전
next: 13.0.4
antd: 5.0.1
소스 : https://github.dev/braverokmc79/node-bird-sns
제로초 소스 : https://github.com/ZeroCho/react-nodebird
84.nginx + https 적용하기
Node.js/Tomcat에서 앱이 이미 실행 중이라 가정
이 글에서는 하나의 서버 연동만을 다룬다. 여러 서버를 연동하고 싶으면 아래 글을 참고
(nginx에 여러 서버, 여러 도메인(Subdomain) 연동하기 (+ ssl 적용))
1. Install nginx
apt-get install nginx
2. nginx 설정 변경
Configuration 파일: /etc/nginx/sites-available/default
server {
	listen 80 default_server;
	listen [::]:80 default_server;

    root [[root directory]];
    server_name _;

    location / {
            # First attempt to serve request as file, then
            # as directory, then fall back to displaying a 404.
            try_files $uri $uri/ =404;
            proxy_pass [[http://IP주소:port]];
    }

}
port는 따로 수정하지 않았다면 Node.js의 기본값은 3000, Tomcat의 기본값은 8080이다.
3. nginx 재시작
Node.js를 실행하고 nginx를 재시작
/etc/init.d/nginx restart
80포트로 접속하면 proxy_pass에 적어둔 주소로 가지는 것을 확인할 수 있다.
4. nginx 관련 기타
nginx 상태 확인: status nginx.service or nginx -t
nginx 로그 위치: /var/log/nginx
아래는 예제 설정 파일
1. 가정 조건
Apple Service
Server: Nginx
Port: 3000
Domain: fruit.com www.fruit.com
Root Directory: /var/html/www/apple
2. Example
/etc/nginx/sites-available/default
server {
	listen 80 default_server;
	listen [::]:80 default_server;

    root /var/html/www/apple;
    server_name fruit.com www.fruit.com;

    location / {
            # First attempt to serve request as file, then
            # as directory, then fall back to displaying a 404.
            try_files $uri $uri/ =404;
            proxy_pass http://localhost:3000;
    }

}
출처
https://it.tarashin.com/nginx-node-js-%EC%97%B0%EB%8F%99%ED%95%98%EA%B8%B0/
85.백엔드에 https 적용하기
강의 :
다음 참조:
우분투 20.04 에서 Nginx 톰캣 연동 및 Ssl 설치
letsencrypt란?
Let's Encrypt는 사용자에게 무료로 TLS 인증서를 발급해주는 비영리기관이다.
이 글에서는 https://letsencrypt.org/ko/getting-started 에서 제공하는 Shell Access 권한이 있을 경우에 사용하는 certbot client를 이용하여 작업을 하였다.
1. certbot 설치
certbot은 자동으로 인증서를 발급받고 관리 및 갱신해주는 프로그램이다.
https://certbot.eff.org/instructions?ws=nginx&os=ubuntufocal 에서 nginx와 ubuntu를 선택하여 설치방법을 따라하였다.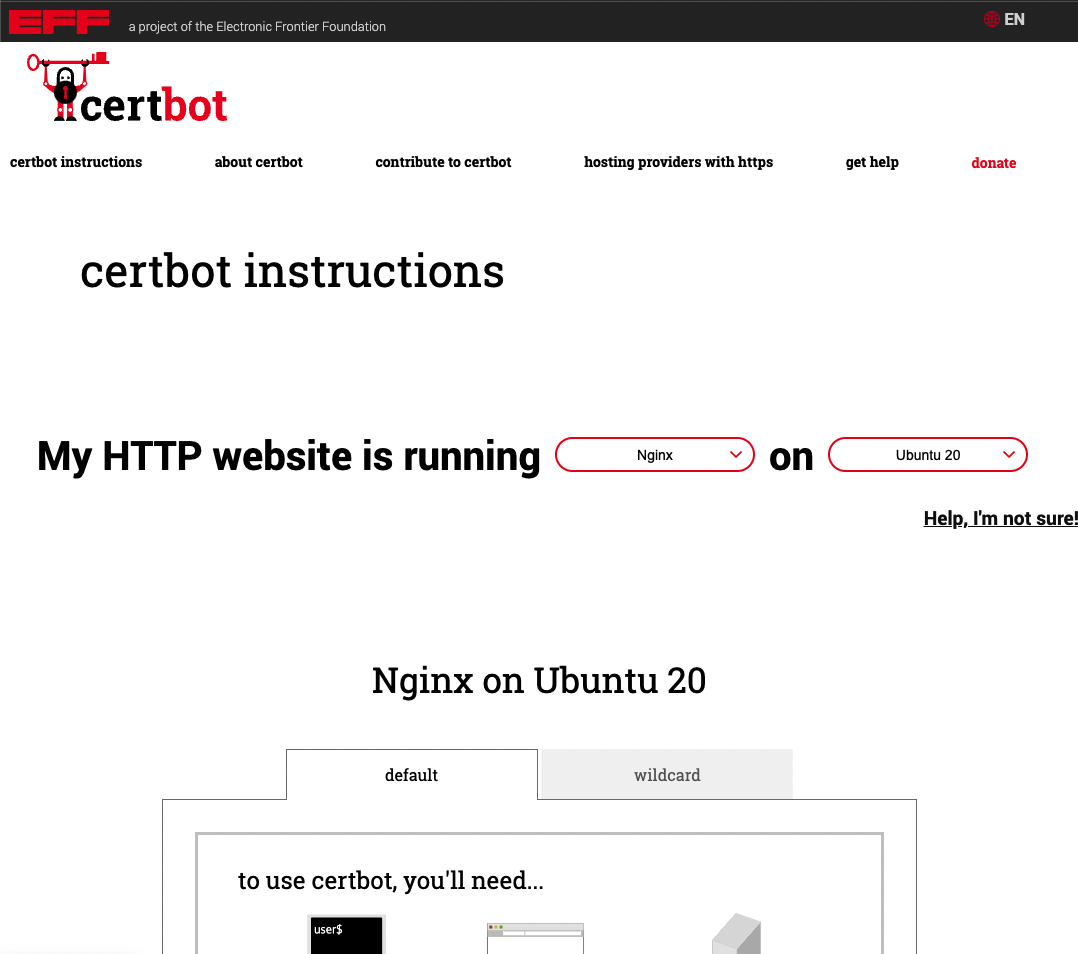
certbot 사이트에 나와있는 설치방법
- SSH into the server
- Install snapd
- Ensure that your version of snapd is up to date
- Remove certbot-auto and any Certbot OS packages
- Install Certbot
- Prepare the Certbot command
- Choose how you'd like to run Certbot
- Test automatic renewal
- Confirm that Certbot worked
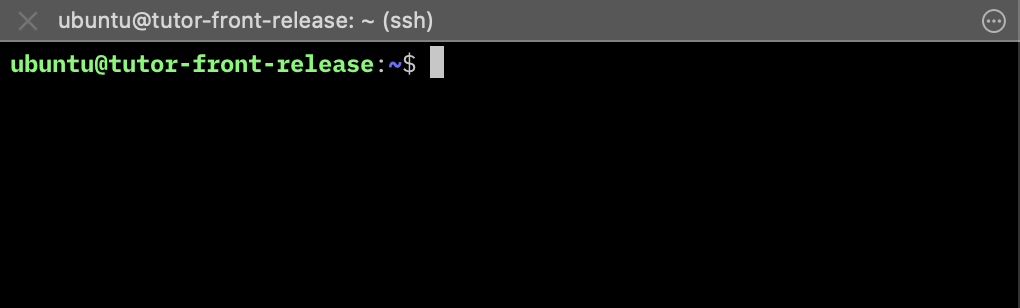
1.1 pem 키를 이용하여 ssh로 서버에 접속한다.
1.2 snapd를 설치한다.
sudo apt update
sudo apt-get install snapd
1.3 snapd를 최신버전으로 업데이트 한다.
sudo snap install core; sudo snap refresh core

1.4 다른 certbot 패키지들이 있는지 확인하고 있다면 제거해준다.
sudo apt-get remove certbot

1.5 certbot 설치
sudo snap install --classic certbot

1.6 certbot 커맨드를 이용하기 위해 로컬 폴더에 링크
sudo ln -s /snap/bin/certbot /usr/bin/certbot
1.7 이후의 과정은 아래의 과정을 진행 후 다시 작업
2. nginx 설정
2.1 nginx conf 파일 수정
ubuntu 기본 설정을 따라 nginx 설정파일을 연다.
sudo vi /etc/nginx/sites-available/default
server_name의 example.com을 자신의 도메인에 맞게 설정하면 된다.
이 서버는 FE의 배포 서버이므로 아래와 같이 location을 설정하였다.
server {
  listen        80;
  server_name   example.com;
  location / {
    root        /home/ubuntu/Project/Front/build;
    index       index.html index.htm;
    try_files   $uri /index.html;
  }
}
위와 같이 default 파일을 변경한 후 :wq를 사용하여 저장한다.
2.2 certbot 실행
sudo certbot --nginx

위 명령어를 실행하면 이메일을 적어주는 것이 나온 후 약관을 묻는다.
이메일을 적어주고 동의하자.
그 이후 자신이 사용할 도메인을 선택하거나 입력해주면 작업이 완료된다.
Congratulations! 가 출력되면 https가 적용된 것이다.
2.3 nginx 재실행 및 redirect 추가
sudo systemctl restart nginx
nginx를 재시작해주면 https가 잘 작동하는 것을 볼 수 있다.
원래는 nginx 설정내에서 80포트를 443포트로 redirect 해주는 코드가 필요하지만 certbot이 알아서 default파일을 아래와 같이 바꾸어 놓으니 따로 작업을 안해주어도 된다.
# sudo vi /etc/nginx/sites-available/default
server {
  server_name   example.com;
  location / {
    root        /home/ubuntu/Project/Front/build;
    index       index.html index.htm;
    try_files   $uri /index.html;
  }

    listen 443 ssl; # managed by Certbot
    ssl_certificate /etc/letsencrypt/live/example.com/fullchain.pem; # managed by Certbot
    ssl_certificate_key /etc/letsencrypt/live/example.com/privkey.pem; # managed by Certbot
    include /etc/letsencrypt/options-ssl-nginx.conf; # managed by Certbot
    ssl_dhparam /etc/letsencrypt/ssl-dhparams.pem; # managed by Certbot

}
server {
    if ($host = example.com) {
        return 301 https://$host$request_uri;
    } # managed by Certbot


  listen        80;
  server_name   example.com;
    return 404; # managed by Certbot
}
이번 포스트에서는 FE 배포 서버를 기준으로 하였으나 BE API 서버는 nginx의 프록시 서버를 이용하여 동일한 과정을 진행하면 가능하다.
86.nginx와 콘솔 에러 해결하기
강의 :
참조: 다방 사이트
프론트 엔드
next.config.js
hidden-source-map 설정
  webpack(config, { webpack }) {
    const prod = process.env.NODE_ENV === 'production';
    const newConfig = {
      ...config,
      mode: prod ? 'production' : 'development',
      plugins: [
        ...config.plugins,
        new webpack.ContextReplacementPlugin(/moment[/\\]locale$/, /^\.\/ko$/),
      ],
    };
    if (prod) {
      newConfig.devtool = 'hidden-source-map';
    }
    return newConfig;
  },
}
store/configureStore.js 에서 다음과 같이 변경
~

const configureSotre = () => {
    const sagaMiddleware = createSagaMiddleware();
    const middlewares = [sagaMiddleware];
    const enhancer = process.env.NODE_ENV === 'production'
        ? compose(applyMiddleware(...middlewares))
        : composeWithDevTools(applyMiddleware(...middlewares));

    // const store = createStore(reducer, enhancer);
    const store = createStore(reducer, enhancer);

    store.sagaTask = sagaMiddleware.run(rootSaga);
    return store;
};

~
https://nextjs.org/docs/api-reference/next/link
다음/링크
예
계속 진행하기 전에 라우팅 소개 를 먼저 읽어 보시기 바랍니다 .
경로 간의 클라이언트 측 전환은 에서 Link내보낸 구성 요소 를 통해 활성화할 수 있습니다 next/link.
예를 들어 pages다음 파일이 있는 디렉토리를 고려하십시오.
- pages/index.js
- pages/about.js
- pages/blog/[slug].js
다음과 같이 이러한 각 페이지에 대한 링크를 가질 수 있습니다.
import Link from 'next/link'

function Home() {
  return (
    <ul>
      <li>
        <Link href="/">Home</Link>
      </li>
      <li>
        <Link href="/about">About Us</Link>
      </li>
      <li>
        <Link href="/blog/hello-world">Blog Post</Link>
      </li>
    </ul>
  )
}

export default Home
Link다음 소품을 받아들입니다.
- href- 탐색할 경로 또는 URL입니다. 이것은 유일한 필수 소품입니다. 객체일 수도 있습니다. 여기에서 예를 참조하세요.
- as- 브라우저 URL 표시줄에 표시될 경로에 대한 선택적 데코레이터. Next.js 9.5.3 이전에는 동적 경로에 사용되었습니다 . 작동 방식을 보려면 이전 문서 를 확인하세요. 참고: 이 경로가 이전 문서에 제공된 경로와 다른 경우 / 동작은 href이전 문서 에 표시된 대로 사용됩니다 .hrefas
- legacyBehavior- 행동을 변경하여 아이가 <a>. 기본값은 false입니다.
- passHref- 자녀에게 재산 Link을 보내도록 강요 합니다. href기본값은false
- prefetch- 백그라운드에서 페이지를 미리 가져옵니다. 기본값은 true입니다. 뷰포트에 있는 모든 <Link />항목(초기 또는 스크롤을 통해)은 미리 로드됩니다. 프리페치는 를 전달하여 비활성화할 수 있습니다 prefetch={false}. prefetch가 로 설정 되면 false호버에서 프리페치가 계속 발생합니다. 정적 생성 을 사용하는 JSON페이지는 더 빠른 페이지 전환을 위해 데이터가 있는 파일을 미리 로드 합니다. 프리페치는 프로덕션에서만 활성화됩니다.
- replacehistory- 스택에 새 URL을 추가하는 대신 현재 상태를 바꿉니다 . 기본값은false
- scroll- 탐색 후 페이지 상단으로 스크롤합니다. 기본값은true
- shallowgetStaticProps- 재실행 하지 않고 현재 페이지의 경로를 업데이트 getServerSideProps하거나 getInitialProps. 기본값은false
- locale- 활성 로케일이 자동으로 추가됩니다. locale다른 로캘을 제공할 수 있습니다. false href기본 동작으로 로케일을 포함해야 하는 경우 비활성화됩니다 .
legacyBehavior가 로 설정되지 않은 경우 true모든 anchor태그 속성은 , , 등 next/link으로 전달될 수 있습니다.classNameonClick
Https 적용후 에러 발생한다면
1. node.js 에서 app.js app.set('trust proxy', 1); 설정
app.js
~if (process.env.NODE_ENV === 'production') {
    //app.set('trust proxy', 1);

    console.log(" production 실행 ");
    app.use(morgan('combined'));
    app.use(hpp());
    app.use(helmet({ contentSecurityPolicy: false }));
    app.use(cors({
        //origin: 'https://nodebird.com'
        // origin: true, // orign: true 로 설정해두면 * 대신 보낸 곳의 주소가 자동으로 들어가 편리합니다.
        //프론트 URL 주소
        origin: ["http://localhost:3060", "http://macaronics.iptime.org", "http://macaronics.iptime.org:3060"],
        credentials: true
    }));

}

~
2.app.js 에서 app.use(session 에서 proxy:true 설정
~


app.use(session({
    secret: process.env.COOKIE_SECRET,
    resave: false,
    saveUninitialized: false,
    proxy:true,
    cookie: {
        httpOnly: true,
        secure: false,
        //**쿠키를 저장할 도메인 설정
        //http://192.168.120.136/
        //domain: process.env.NODE_ENV === 'production' && '.mynodebird.com'
        domain: process.env.NODE_ENV === 'production' && 'macaronics.iptime.org'
    }
}));


~
3. nginx 에서 proxy_set_header X-Forwarded-Proto $scheme; 추가
	server{
		server_name 192.168.120.137;
		listen 80;

          location / {
            proxy_set_header    Host $host;
            proxy_set_header    X-Forwarded-Proto $scheme;

            proxy_pass http://localhost:3065; #whatever port your app runs on
            proxy_redirect      off;
            charset utf-8;
         }


	}
87.게시글 수정하기
강의 :
백엔드
routes/post.js
~


//게시글 수정
router.patch('/:postId', isLoggedIn, async (req, res, next) => {
    const hashtags = req.body.content.match(/#[^\s#]+/g);
    try {
        await Post.update({
            content: req.body.content
        }, {
            where: {
                id: req.params.postId,
                UserId: req.user.id
            },
        });

        const post = await Post.findOne({ where: { id: req.params.postId } });

        if (hashtags) {
            const result = await Promise.all(hashtags.map((tag) => Hashtag.findOrCreate({
                where: { name: tag.slice(1).toLowerCase() }
            }
            )));

            //setHashtags 기존 해시태그 제거후 업데이트
            await post.setHashtags(result.map((v) => v[0]));
        }

        res.status(200).json({ PostId: parseInt(req.params.postId, 10), content: req.body.content })
    } catch (error) {
        console.error(error);
        next(error);
    }
});


~
프론트엔드
reducers/post.js
~

        //글수정
        case UPDATE_POST_REQUEST:
            draft.updatePostLoading = true;
            draft.updatePostDone = false;
            draft.updatePostError = null;
            break;

        case UPDATE_POST_SUCCESS:
            draft.updatePostLoading = false;
            draft.updatePostDone = true;
            draft.mainPosts.find((v) => v.id === action.data.PostId).content = action.data.content;
            break;

        case UPDATE_POST_FAILURE:
            draft.updatePostLoading = false;
            draft.updatePostError = action.error;
            break;


~
saga/post.js
~


//게시글 수정
function updatePostAPI(data) {
    console.log("게시글 수정 : ", data);

    return axios.patch(`/post/${data.PostId}`, data);
}

function* updatePost(action) {
    try {
        const result = yield call(updatePostAPI, action.data);
        yield put({
            type: UPDATE_POST_SUCCESS,
            data: result.data
        });

    } catch (err) {
        console.log(err);
        yield put({
            type: UPDATE_POST_FAILURE,
            error: err.response.data
        });
    }
}

function* watchUpdatePost() {
    yield takeLatest(UPDATE_POST_REQUEST, updatePost);
}


~
components/PostCard.js
~

    const onClickUpdate = useCallback(() => {
        setEditMode(true);
    }, []);

    const onCancelUpdatePost = useCallback(() => {
        setEditMode(false);
    }, []);

    const onChangePost = useCallback((editText) => () => {
        dispatch({
            type: UPDATE_POST_REQUEST,
            data: {
                PostId: post.id,
                content: editText,
            },
        });
    }, [post]);


~


  <Space wrap>
                    {!post.RetweetId && <Button type='primary' info onClick={onClickUpdate} >수정</Button>}

                    <Button type='primary' danger loading={removePostLoading} onClick={onRemovePost}>삭제</Button>
                </Space>


~

  <>
                        <div style={{ float: 'right' }}>{moment(post.createdAt).format('YYYY.MM.DD')}</div>
                        <Card.Meta
                            avatar={
                                <Link href={`/user/${post.User.id}`} prefetch={false}>
                                    <Avatar>{post.User.nickname[0]}</Avatar>
                                </Link>
                            }
                            title={post.User.nickname}
                            description={<PostCardContent editMode={editMode}
                                onChangePost={onChangePost}
                                onCancelUpdatePost={onCancelUpdatePost} postData={post.content} />}
                        />
                    </>
components/PostCardContent.js
import React, { useCallback, useState, useEffect } from 'react';
import { Input, Button, Space } from 'antd';
import PropTypes from 'prop-types';
import Link from 'next/link';
import { useSelector } from 'react-redux';

const { TextArea } = Input;
const PostCardContent = ({ postData, editMode, onChangePost, onCancelUpdatePost }) => {
    const { updatePostLoading, updatePostDone } = useSelector((state) => state.post);
    const [editText, setEditText] = useState(postData);

    const onChangeText = useCallback((e) => {
        setEditText(e.target.value);
    });

    useEffect(() => {
        if (updatePostDone) {
            onCancelUpdatePost();
        }
    }, [updatePostDone]);


    return (
        <div>
            {
                editMode ? (
                    <>
                        <TextArea value={editText} onChange={onChangeText} />

                        <Space wrap>
                            <Button type='primary' info loading={updatePostLoading} onClick={onChangePost(editText)} > 수정</Button>
                            <Button type='primary' danger onClick={onCancelUpdatePost}  >취소</Button>
                        </Space>
                    </>
                ) :

                    postData && postData.split(/(#[^\s#]+)/g).map((v, index) => {
                        if (v.match(/(#[^\s#]+)/)) {
                            return <Link key={index} href={`/hashtag/${v.slice(1)}`} prefetch={false} >{v}</Link>
                        }
                        return v;
                    })
            }
        </div >
    );
};

PostCardContent.propTypes = {
    postData: PropTypes.string.isRequired,
    editMode: PropTypes.bool,
    onCancelUpdatePost: PropTypes.func.isRequired
}

PostCardContent.defaultProps = {
    editMode: false
}


export default PostCardContent;
88.빠르게 어드민 페이지 만들기
강의 :
89.팔로잉한 게시글만 가져오기
강의 :
related
  const followings = await User.findAll({
            attributes: ['id'],
            include: [{
                model: User,
                as: 'Followers',
                where: { id: req.user.id }
            }]
        });
        const where = {
            UserId: { [Op.in]: followings.map((v) => v.id) }
        };
unrelated
   const followings = await User.findAll({
            attributes: ['id'],
            include: [{
                model: User,
                as: 'Followers',
                where: { id: req.user.id }
            }]
        });
        const where = {
            UserId: { [Op.notIn]: followings.map((v) => v.id).concat(req.user.id) }
        };
routes/posts.js
const express = require('express');
const { Op } = require('sequelize');
const { Post, Image, User, Comment } = require('../models');

const router = express.Router();


//GET /posts
router.get('/', async (req, res, next) => {

    try {
        console.log(" 마지막 아이디  :", req.query.lastId);
        const where = {};
        if (parseInt(req.query.lastId, 10)) { //초기 로딩이 아닐때
            //다음 코드 내용은 id 가  lastId  보다 작은 것 =>  id < lastId
            // Op 의미는 연산자 의미  lt 는  <
            where.id = { [Op.lt]: parseInt(req.query.lastId, 10) }
        };

        const posts = await Post.findAll({
            where,
            limit: 10,
            order: [
                ['createdAt', 'DESC'],
                [Comment, 'createdAt', 'DESC']
            ],
            // offsset: parseInt(req.params.limit),
            //21,20,19,18,17,16,15,14,13,12,11,10,9,8,7,6,5,4,3,2,1
            include: [{
                model: User,
                attributes: ['id', 'nickname']
            },
            {
                model: Image
            },
            {
                model: Comment,
                include: [{
                    model: User,
                    attributes: ['id', 'nickname']
                }]
            },
            {
                model: User, //좋아요 누른 사람
                as: 'Likers',
                attributes: ['id']
            },
            {
                model: Post,
                as: 'Retweet',
                include: [
                    {
                        model: User,
                        attributes: ['id', 'nickname']
                    },
                    {
                        model: Image
                    }
                ]
            }
            ]
        });

        res.status(200).json(posts);

    } catch (error) {
        console.error("posts error : ", error);
        next(error);
    }

});


router.get('/related', async (req, res, next) => {
    try {
        const followings = await User.findAll({
            attributes: ['id'],
            include: [{
                model: User,
                as: 'Followers',
                where: { id: req.user.id }
            }]
        });
        const where = {
            UserId: { [Op.in]: followings.map((v) => v.id) }
        };
        if (parseInt(req.query.lastId, 10)) { // 초기 로딩이 아닐 때
            where.id = { [Op.lt]: parseInt(req.query.lastId, 10) }
        } // 21 20 19 18 17 16 15 14 13 12 11 10 9 8 7 6 5 4 3 2 1
        const posts = await Post.findAll({
            where,
            limit: 10,
            order: [
                ['createdAt', 'DESC'],
                [Comment, 'createdAt', 'DESC'],
            ],
            include: [{
                model: User,
                attributes: ['id', 'nickname'],
            }, {
                model: Image,
            }, {
                model: Comment,
                include: [{
                    model: User,
                    attributes: ['id', 'nickname'],
                }],
            }, {
                model: User, // 좋아요 누른 사람
                as: 'Likers',
                attributes: ['id'],
            }, {
                model: Post,
                as: 'Retweet',
                include: [{
                    model: User,
                    attributes: ['id', 'nickname'],
                }, {
                    model: Image,
                }]
            }],
        });
        res.status(200).json(posts);
    } catch (error) {
        console.error(error);
        next(error);
    }
});

router.get('/unrelated', async (req, res, next) => {
    try {
        const followings = await User.findAll({
            attributes: ['id'],
            include: [{
                model: User,
                as: 'Followers',
                where: { id: req.user.id }
            }]
        });
        const where = {
            UserId: { [Op.notIn]: followings.map((v) => v.id).concat(req.user.id) }
        };
        if (parseInt(req.query.lastId, 10)) { // 초기 로딩이 아닐 때
            where.id = { [Op.lt]: parseInt(req.query.lastId, 10) }
        } // 21 20 19 18 17 16 15 14 13 12 11 10 9 8 7 6 5 4 3 2 1
        const posts = await Post.findAll({
            where,
            limit: 10,
            order: [
                ['createdAt', 'DESC'],
                [Comment, 'createdAt', 'DESC'],
            ],
            include: [{
                model: User,
                attributes: ['id', 'nickname'],
            }, {
                model: Image,
            }, {
                model: Comment,
                include: [{
                    model: User,
                    attributes: ['id', 'nickname'],
                }],
            }, {
                model: User, // 좋아요 누른 사람
                as: 'Likers',
                attributes: ['id'],
            }, {
                model: Post,
                as: 'Retweet',
                include: [{
                    model: User,
                    attributes: ['id', 'nickname'],
                }, {
                    model: Image,
                }]
            }],
        });
        res.status(200).json(posts);
    } catch (error) {
        console.error(error);
        next(error);
    }
})


module.exports = router;


댓글 ( 4)
댓글 남기기